Before you start
Connect your Twitch account and use a browser with speech synthesis support. Available voices depend on your browser and operating system. The hosted site uses browser speech; you do not need to supply a paid TTS provider key for this setup.
1. Decide who can speak
In first-run setup, choose On — speak eligible messages, then Selected viewers or Everyone. For selected viewers, enter the approved viewer names separated by commas.
After setup, use Settings → TTS access & filters to manage approved viewers, automatic access rules, blocked viewers, and message filters. Existing access rules still apply; event announcements have separate controls in Events.
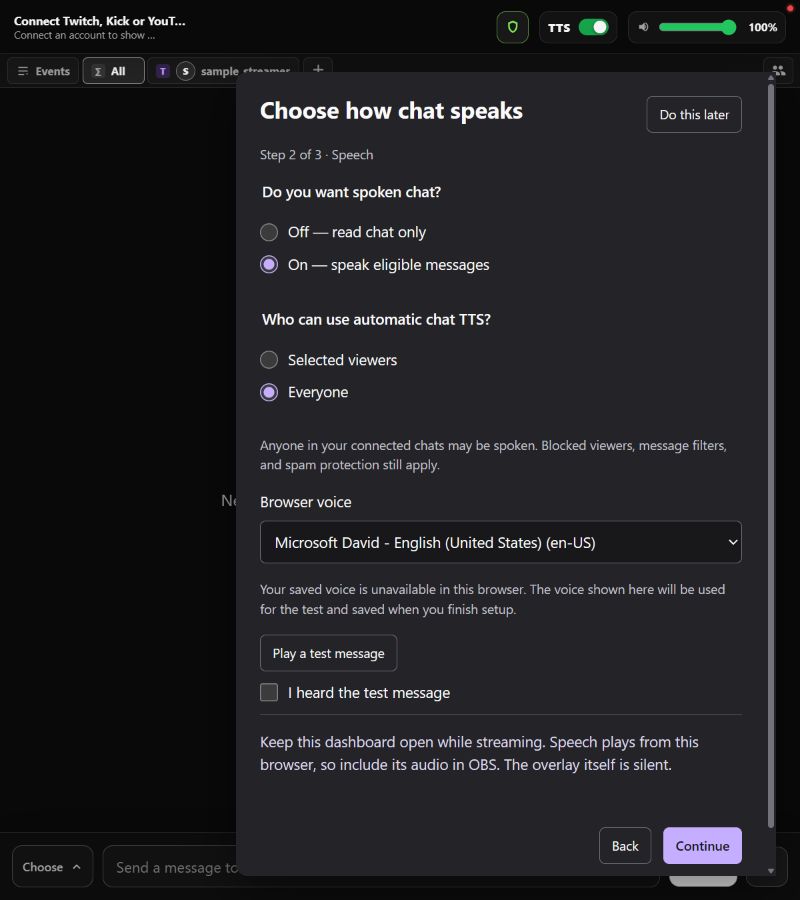
2. Choose and test your voice
Choose a Browser voice during setup and select Play a test message. Confirm that you heard it before finishing. After setup, change your voice, speed, and volume in Voice & audio.
If the toolbar shows Enable audio, click it to allow speech to start. Browsers may require a click before playing sound.
3. Keep the dashboard open
Speech plays from the dashboard’s browser tab. Keep that tab open during your stream. The OBS chat overlay is visual and silent; adding it alone does not add spoken chat to your broadcast.
In OBS, capture the browser’s audio through your chosen desktop or application audio source. Record a short local test and listen back to confirm the voice is captured once, at a comfortable level.
If messages are not spoken
- First check that new chat messages are arriving.
- Check TTS is enabled, the tab is not muted, and the browser/output volume is audible.
- Use a viewer allowed by your TTS access rules and a message that passes your filters.
- Check whether speaking detection is temporarily holding speech while you talk.
- If no voices appear, try a browser or operating-system voice that supports speech synthesis.
To display the same chat on stream, continue with the OBS overlay guide.
Keep setting up
Need a hand? contactizidore@gmail.com